First off… The result hasn’t been what I planned it to be. The main reason for this is, well, that I have a day job. 😀
The result, however, was fantastic! It’s a simple layout with two trains running in opposite directions, two stations and a control tower in the middle.
(Image of layout to be uploaded)
It’s all controlled by an Arduino Uno. There are ten light sensitive resistors. Each station has two tracks, each track has two LDR:s. When a train passes the first it slows down, and when it passes the second it stops. The train then wait five seconds and then starts again unless there is another train on the track it is supposed to drive into. The last two LDR:s are placed at each end of the longest straight and when a train enters the first it speeds up, and when it enters the second it slows down.
An LDR require an analog input and since the Arduino only has six I used a 74HC4051 to connect eight analog inputs on one analog pin and three digital pins. A very nice trade if I may say so myself. I also connected a 2004 LCD to output som debug information.
I connected four Infrared LED:s and put them on a tower to give the clear line of sight to the trains.
Result
On the whole the result was really cool. The trains behaved really well and only crashed a few times. I like the tower with the electronics and the look of the trains. I addition the trains run really close to each other, adding to the excitement.
(Placeholder for some pictures and movies)
Lessons Learned
If you do something new for two days straight you will learn a lot of things. These are some of my lessons.
Battery Power
Lego trains use a lot of battery power. That’s somewhat expected. What I did not expect was the variation in speed depending on the power of the batteries. The passenger train ran off the table on the first battery change and both trains behaved differently when stopping on the stations causing quite a few crashes. I think I will try and power the trains by some other means next time.
Switches
The Lego switches are a bit problematic. The actual switching is very stiff but it holds its place weakly. As my layout was dependent on running the switches ‘the wrong way backwards’ this was a bit of an issue, the the ‘cow’ car of 60052 was the only car with consistent issues so I left it at home.
Wheels
The back wheels of the 60052 train was constantly pushed together by the switches and this led to friction and caused battery drain and slowness. I did not find this out until the second day, but when I switched the wheels from the Technic construction to the standard train car wheels the Blue engine was a lot faster and worked better.
Movie
It seems I didn’t get any useable pictures. That’s a bit unfortunate. But I did get some videos and put them together.
Code and Electronics
The code used is a bit too unwieldy to include on this page, but have a look at it on my Bitbucket page -here-.
It’s not that well documented at the moment. My plan is to fix this in upcoming versions.
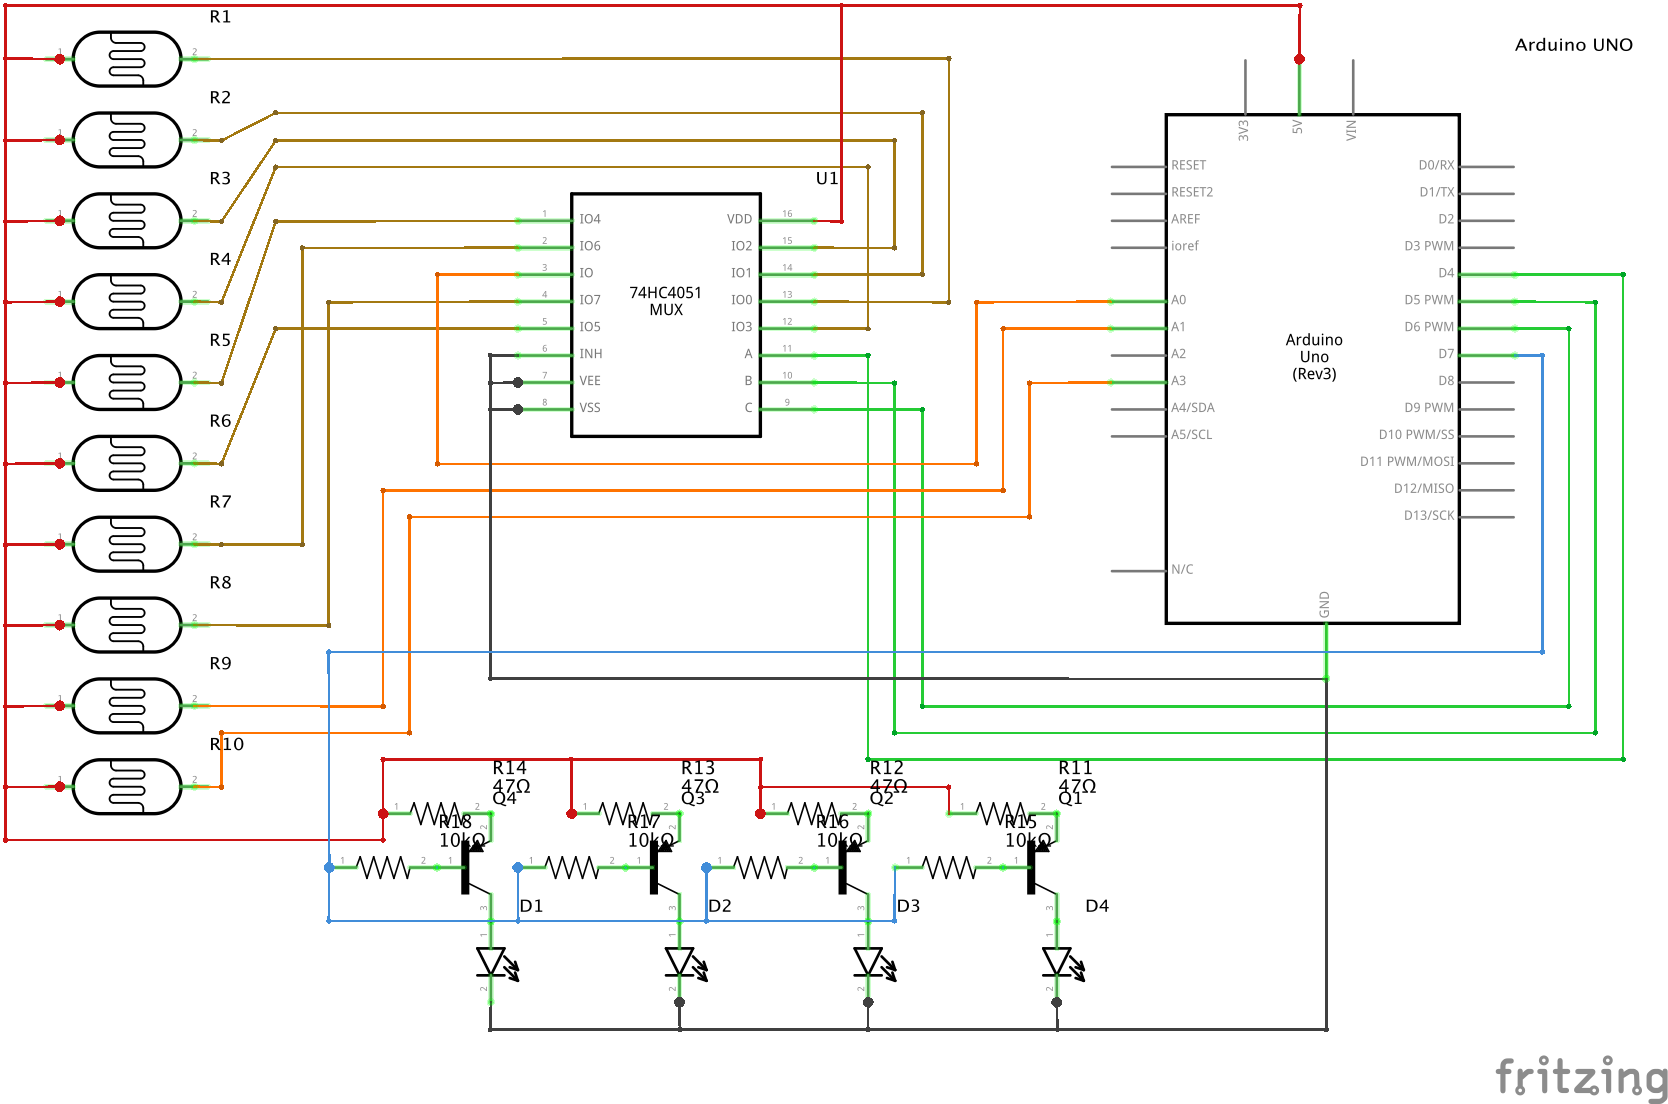
I connected a 2004 LCD and a power supply as well but these have been omitted to make the diagram a bit more readable.
Inspiration
https://www.youtube.com/watch?v=FgGIkCWxvfk
http://forum.arduino.cc/index.php?topic=89310.0
https://github.com/jurriaan/Arduino-PowerFunctions (Not the one I used)
https://legopal.wordpress.com/2014/06/27/first-attempt-at-driving-a-train/#more-54